Fonts have a great impact on the overall visual appeal of a blog. Blogger / Blogspot already comes with over 98 different fonts to choose from. However, if you are not satisfied with the selection of fonts provided by Blogger, you may want to look at the fonts offered by Google Fonts. Google Fonts has a large collection of over 915 fonts and they are free to use without any restriction. In this article, I will guide you on how to add a font from Google Fonts in Blogspot blog.
The process of getting a Google Fonts font work in your Blogspot blog can be summarised in two steps:
- Add the font from Google Fonts to Blogger blog.
- Use the added Google Font.
Let’s go into the details on how to do these.
Table of Contents
How to add a font from Google Fonts
First head on to the Google Fonts website here. You will see hundreds of fonts displayed on the webpage. Google has done a great job making it as easy as possible to browse and preview the fonts. Be careful not to get lost down the rabbit hole in search of the perfect font!
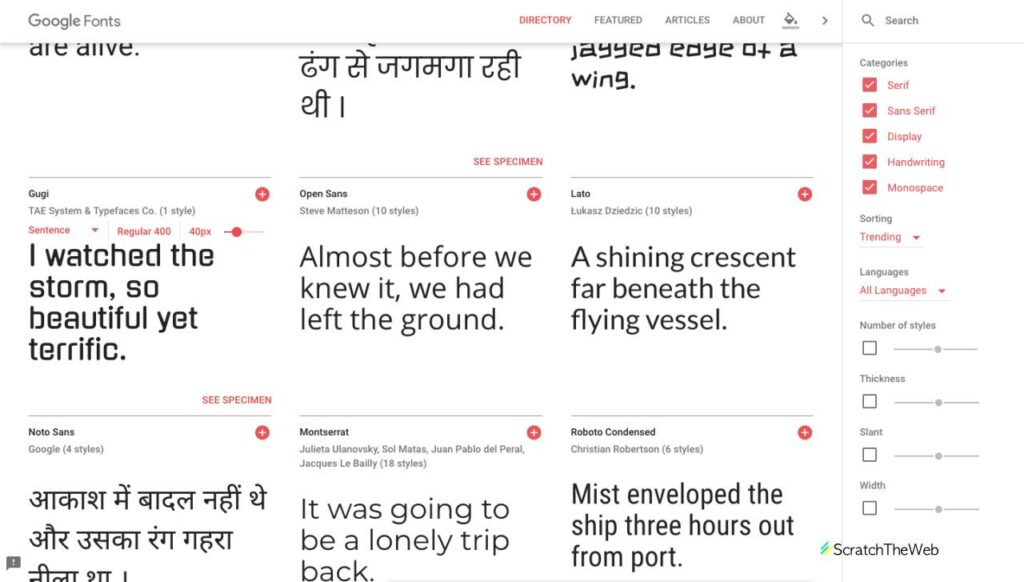
Once you have found a font of your liking, click on the “+” button beside the font. A small window will pop up with the codes that you need to add to the blog. In the screenshot below, I have selected the font named “Gugi”.
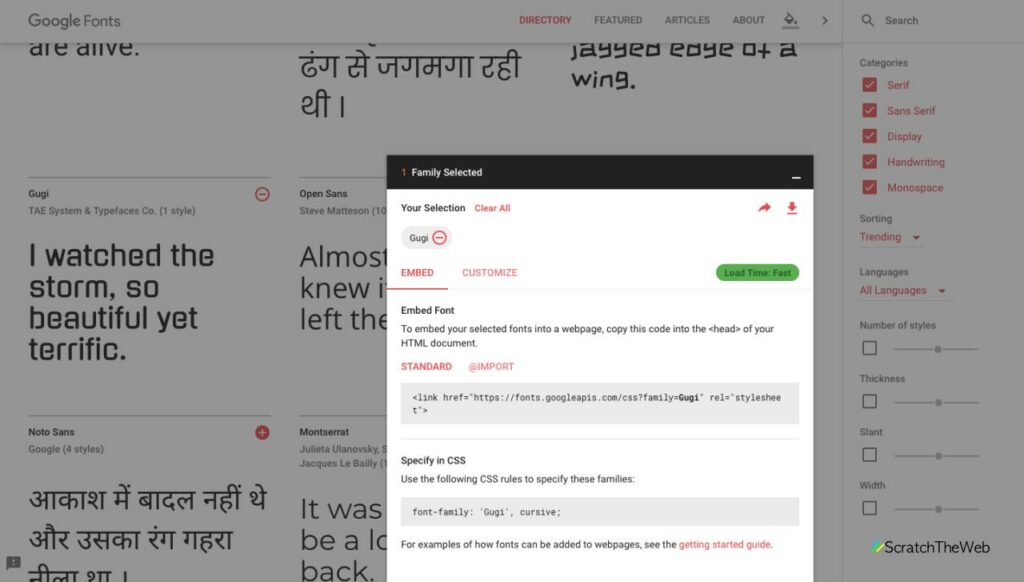
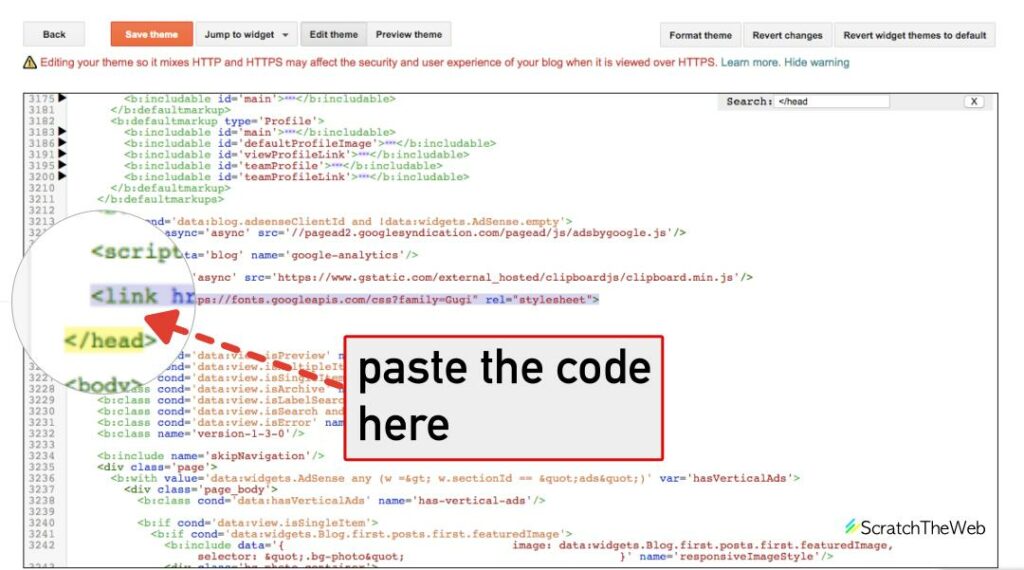
Now you need to add the code to your Blogger blog theme HTML code. Copy the first code and head on the your Blogger dashboard > Theme > Edit HTML and search for “</head>”.
To search for closing head tag “</head>” in the theme code, click somewhere in the code and then press the key combination “Ctrl + f” in Windows or “Command + f”. A search box will appear.
Paste the code we copied earlier before the “</head>” as shown in the screenshot below.
Click on Save theme button to save the changes.
The font has been now successfully added to your blog and the font file will load when blog is opened in the browser. Now we need to tell the web browser to use this font.
How to use the Google Font in Blogger
We need to tell the web browser to use the font that we added from Google Fonts. For that, we specify some CSS codes. With the help of CSS codes, we can target certain elements to use a particular font.
To add CSS codes to Blogger blog, go to Blogger dashboard > Theme > Customize > Advanced > Add CSS.
If you want the entire blog to use the “Gugi” font I added to the blog, I will add the following code in the custom CSS box in Blogger.
body {
font-family: 'Gugi', cursive;
}
To specify only the blog post title to have this particular font, use the following code
.post-title {
font-family: 'Gugi', cursive;
}
To apply the font only to the blog post body, use the following code.
.post-body {
font-family: 'Gugi', cursive;
}
Click on Apply to Blog button to save it.
That’s it! The blog should now load the added fonts.
Conclusion
I hope you found this guide helpful in adding Google Fonts to your Blogger / Blogspot blog. For more tips and guides related to blogging, make sure to subscribe to us via email.






Leave a Reply